Update: This post is outdated, be careful while following the instructions.
ASP.NET core has been ready for quite a while, along with it's cross platform nature we can make apps for non-windows system totally, such as macOS and Linux. This article will show how we can make things up in Ubuntu from scratch.
Prerequisite
Before we make progress, we need a Ubuntu LTS machine which you have root privilege. In this article, I will create a new droplet in DigitalOcean, that's Ubuntu 16.04. Also, we need to add a new DNS record A to your domain to point to that server, this is a must for Caddy server.
Install .NET core
Follow steps listed in official document, we execute like:
sudo sh -c 'echo "deb [arch=amd64] https://apt-mo.trafficmanager.net/repos/dotnet-release/ xenial main" > /etc/apt/sources.list.d/dotnetdev.list'
sudo apt-key adv --keyserver hkp://keyserver.ubuntu.com:80 --recv-keys 417A0893
sudo apt-get update
sudo apt-get install dotnet-dev-1.0.1
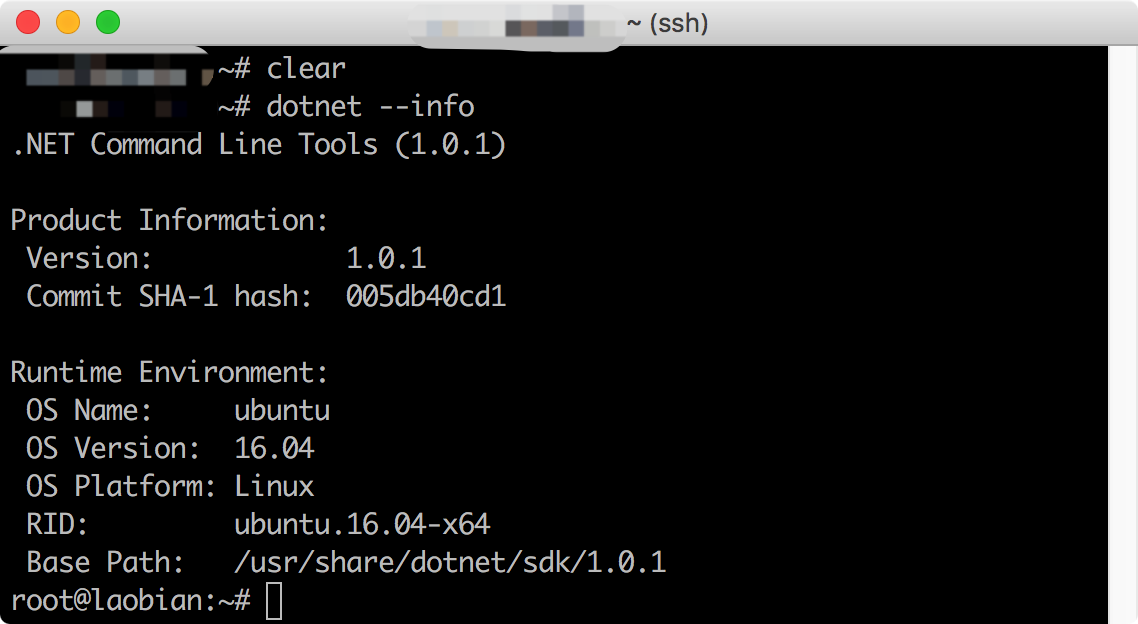
We can verify your installation by dotnet --info, it will output version and platform information if everything is all set.
Install MySQL
We use MySQL as our database in Ubuntu platform, of course you can switch to your preference as you wish. The reason we prefer MySQL is it's mature and popular characteristic, and we can make use EntityFramework Core easily which switched from MS SQL Server with just one line of configuration, such as builder.UseMySql(...). But we will not cover that part, instead we just show how to make MySQL work in our target platform.
sudo apt-get install mysql-server
sudo mysql_secure_installation
After the installation and configuration finished, we should also enable some important features too.
Add UTF-8 encoding as default under [mysqld] section in /etc/mysql/mysql.conf.d/mysqld.cnf
init_connect='SET collation_connection = utf8_unicode_ci'
init_connect='SET NAMES utf8'
character-set-server=utf8
collation-server=utf8_unicode_ci
skip-character-set-client-handshake
Uncomment bind-address 127.0.0.1 in /etc/mysql/mysql.conf.d/mysqld.cnf. By this means, we just make sure we can access our MySQL database from local development machine just in case. However, this is not recommand as it will bring security hole. So just think over this approach or comment this setting again after your development process finished.
We should not expose root account to anywhere, instead we can setup a new account for our usage.
mysql -u root -p
> CREATE USER 'username'@'%' IDENTIFIED BY 'password';
> GRANT ALL PRIVILEGES ON * . * TO 'username'@'%';
> FLUSH PRIVILEGES;
Register and start our MySQL service.
systemctl enable mysql
systemctl restart mysql
Install Caddy
Caddy is rather new to Apache and Nginx, it has many modern and fashion features such as automatically enable HTTPS and HTTP/2, and it's configuration is more straightforward too. To install Caddy in Ubuntu, we have to download from https://caddyserver.com/download since it doesn't have a APT distribution package ready yet.
However, we can use one line command to install since Caddy already provided one shell script we can make use.
curl https://getcaddy.com | bash -s http.cors,http.expires
Note that the -s parameter indicates the directives you can choose.
By default, the caddy is installed at /usr/local/bin, we can copy it to our souce code repository folder.
cp /usr/local/bin/caddy /var/www/caddy
Make all things work
Since we already prepared tools we'd like before, we can start to make everything together to work.
Copy your source code to /var/www, and use dotnet run ... to test you code can work correctly.
As you may already know, dotnet core doesn't provide nature feature to run in background which means it will exit once your remote SSH session ended. Either use screen command or you can apply more powerful approach with systemd.
Add service configuration(unit file) to /etc/systemd/system, such as yoursite.service.
[Unit]
Description=Home
[Service]
WorkingDirectory=/var/www/yoursite
ExecStart=/usr/bin/dotnet /var/www/yoursite/yoursite.dll
Restart=no
RestartSec=10
SyslogIdentifier=yoursite
User=root
Environment=ASPNETCORE_ENVIRONMENT=Production
[Install]
WantedBy=multi-user.target
Same with dotnet core, Caddy also need to be run under systemd. So put another service unit file in /etc/systemd/system.
[Unit]
Description=Caddy webserver
Documentation=https://caddyserver.com/
After=network.target
[Service]
User=root
WorkingDirectory=/var/www
LimitNOFILE=4096
ExecStart=/var/www/caddy -log stdout -agree=true -email JerryBian@outlook.com -conf=/var/www/Caddyfile
Restart=on-failure
StartLimitInterval=600
[Install]
WantedBy=multi-user.target
Don't forget to give Caddy enough permission.
sudo setcap cap_net_bind_service=+ep /var/www/caddy
Regarding of the Caddyfile, it's super simple for our case.The caddy server will enable HTTPS and HTTP/2 automatically, and redirect HTTP request to HTTPS automatically.
yoursite.com {
	proxy / localhost:8000 {
		transparent
	}
	gzip
}
The transparent property here is very important, which is shor for
header_upstream Host {host}
header_upstream X-Real-IP {remote}
header_upstream X-Forwarded-For {remote}
header_upstream X-Forwarded-Proto {scheme}
It passes through host information from the original request to backend which our app may need later in code such as Request.Host .etc.
If you are lucky, you can start all these stuff.
systemctl restart yoursite
systemctl restart caddy
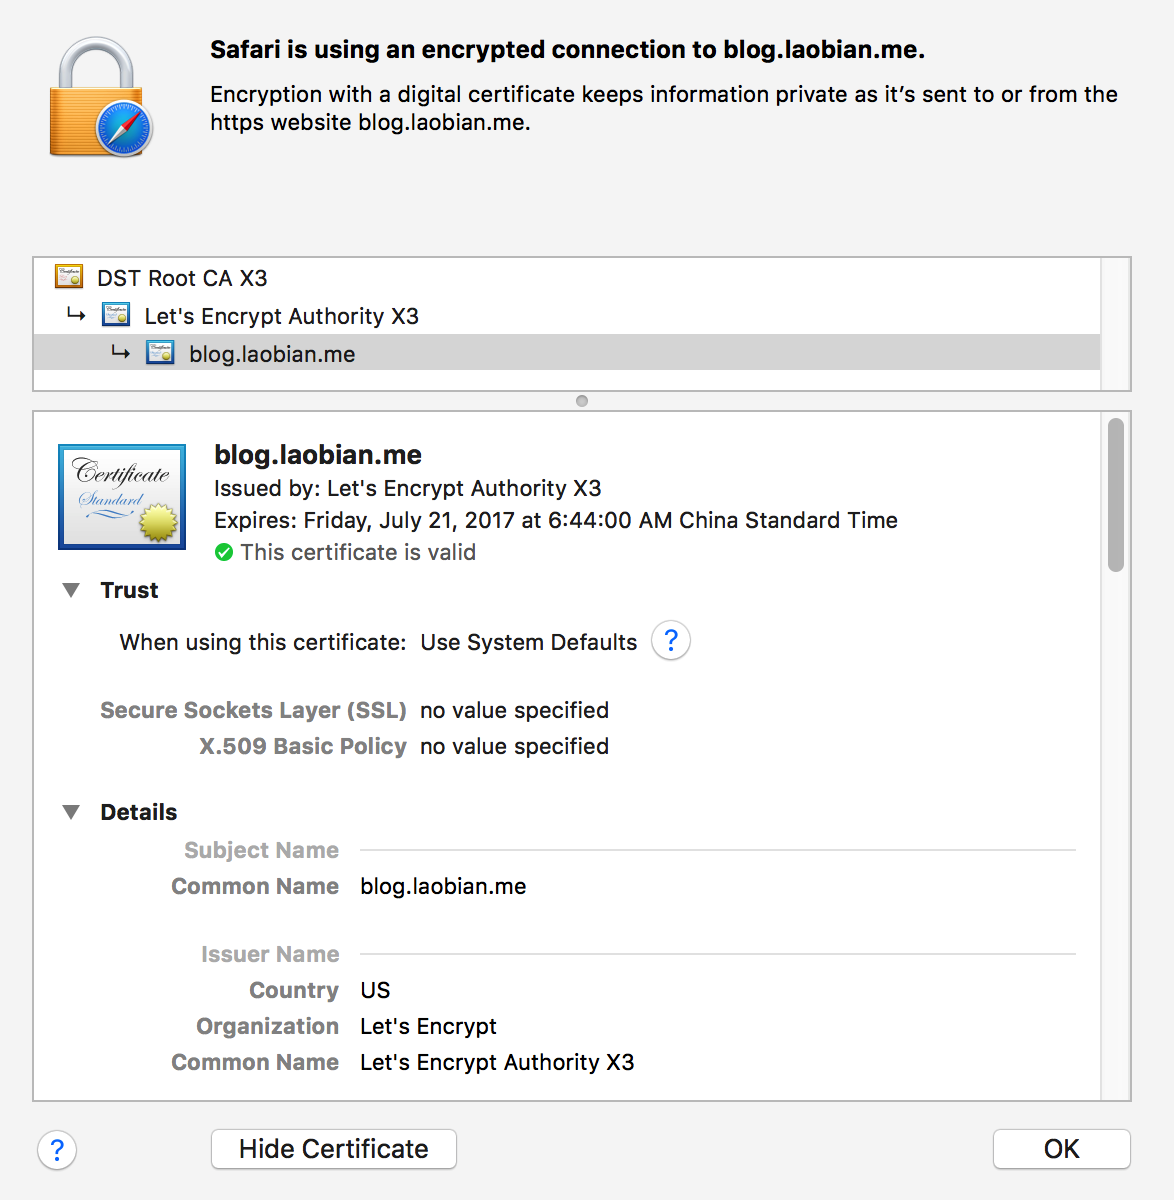
Navigate to your website in browser, check the security status.